Host code optimisation
In the previous part, we focused on optimizing the kernel, aiming for optimal memory transfer, and streamlining the datapath. However, there is room for improvement in the host code. By fine-tuning the host code, we can optimize memory transfer between host memory and the device, invoke the execution of multiple kernels, facilitate more efficient synchronization between the host and kernel, and more.
In this part, we implement a program to multiply two matrices. While writing a separate kernel for matrix multiplication is a common approach, we will leverage the previously created matrix-vector multiplication kernel. In other words, we simplify the matrix multiplication problem as a set of matrix-vector operations that can be calculated in parallel. In this exercise, we will employ four compute units for matrix-vector multiplication to perform matrix multiplication. The approach is illustrated in the image below. Each kernel receives matrix A as input, while the column and resulting vector will differ. Kernels cyclically receive columns, enabling us to process this matrix multiplication in a loop-stripping fashion. While the implementation may not be optimal, its concept is straightforward and illustrates the parallel execution of multiple kernels.
To allow the execution of multiple kernels, several changes need to be introduced in the host code compared to the previous implementation:
- Kernel Instantiation: We instantiate several kernels under the same queue and context.
1 2 3 4 5 6 7 8 9 10 11 12 13 14 | |
1 2 3 4 5 6 7 8 9 10 11 12 13 | |
- Matrix Multiplication: The matrix multiplication is divided into two parts. In the first part, for every kernel, the arguments are set, and the execution of the kernel is started. Then, the code waits for all kernels to finish execution. In the second part, the results are collected, and the next loop iteration is performed.
1 2 3 4 5 6 7 8 9 10 11 12 13 14 15 16 17 18 19 20 21 22 23 | |
These changes enable the parallel execution of multiple kernels, allowing for a more efficient matrix-vector multiplication. Now, let's analyze the obtained traces.

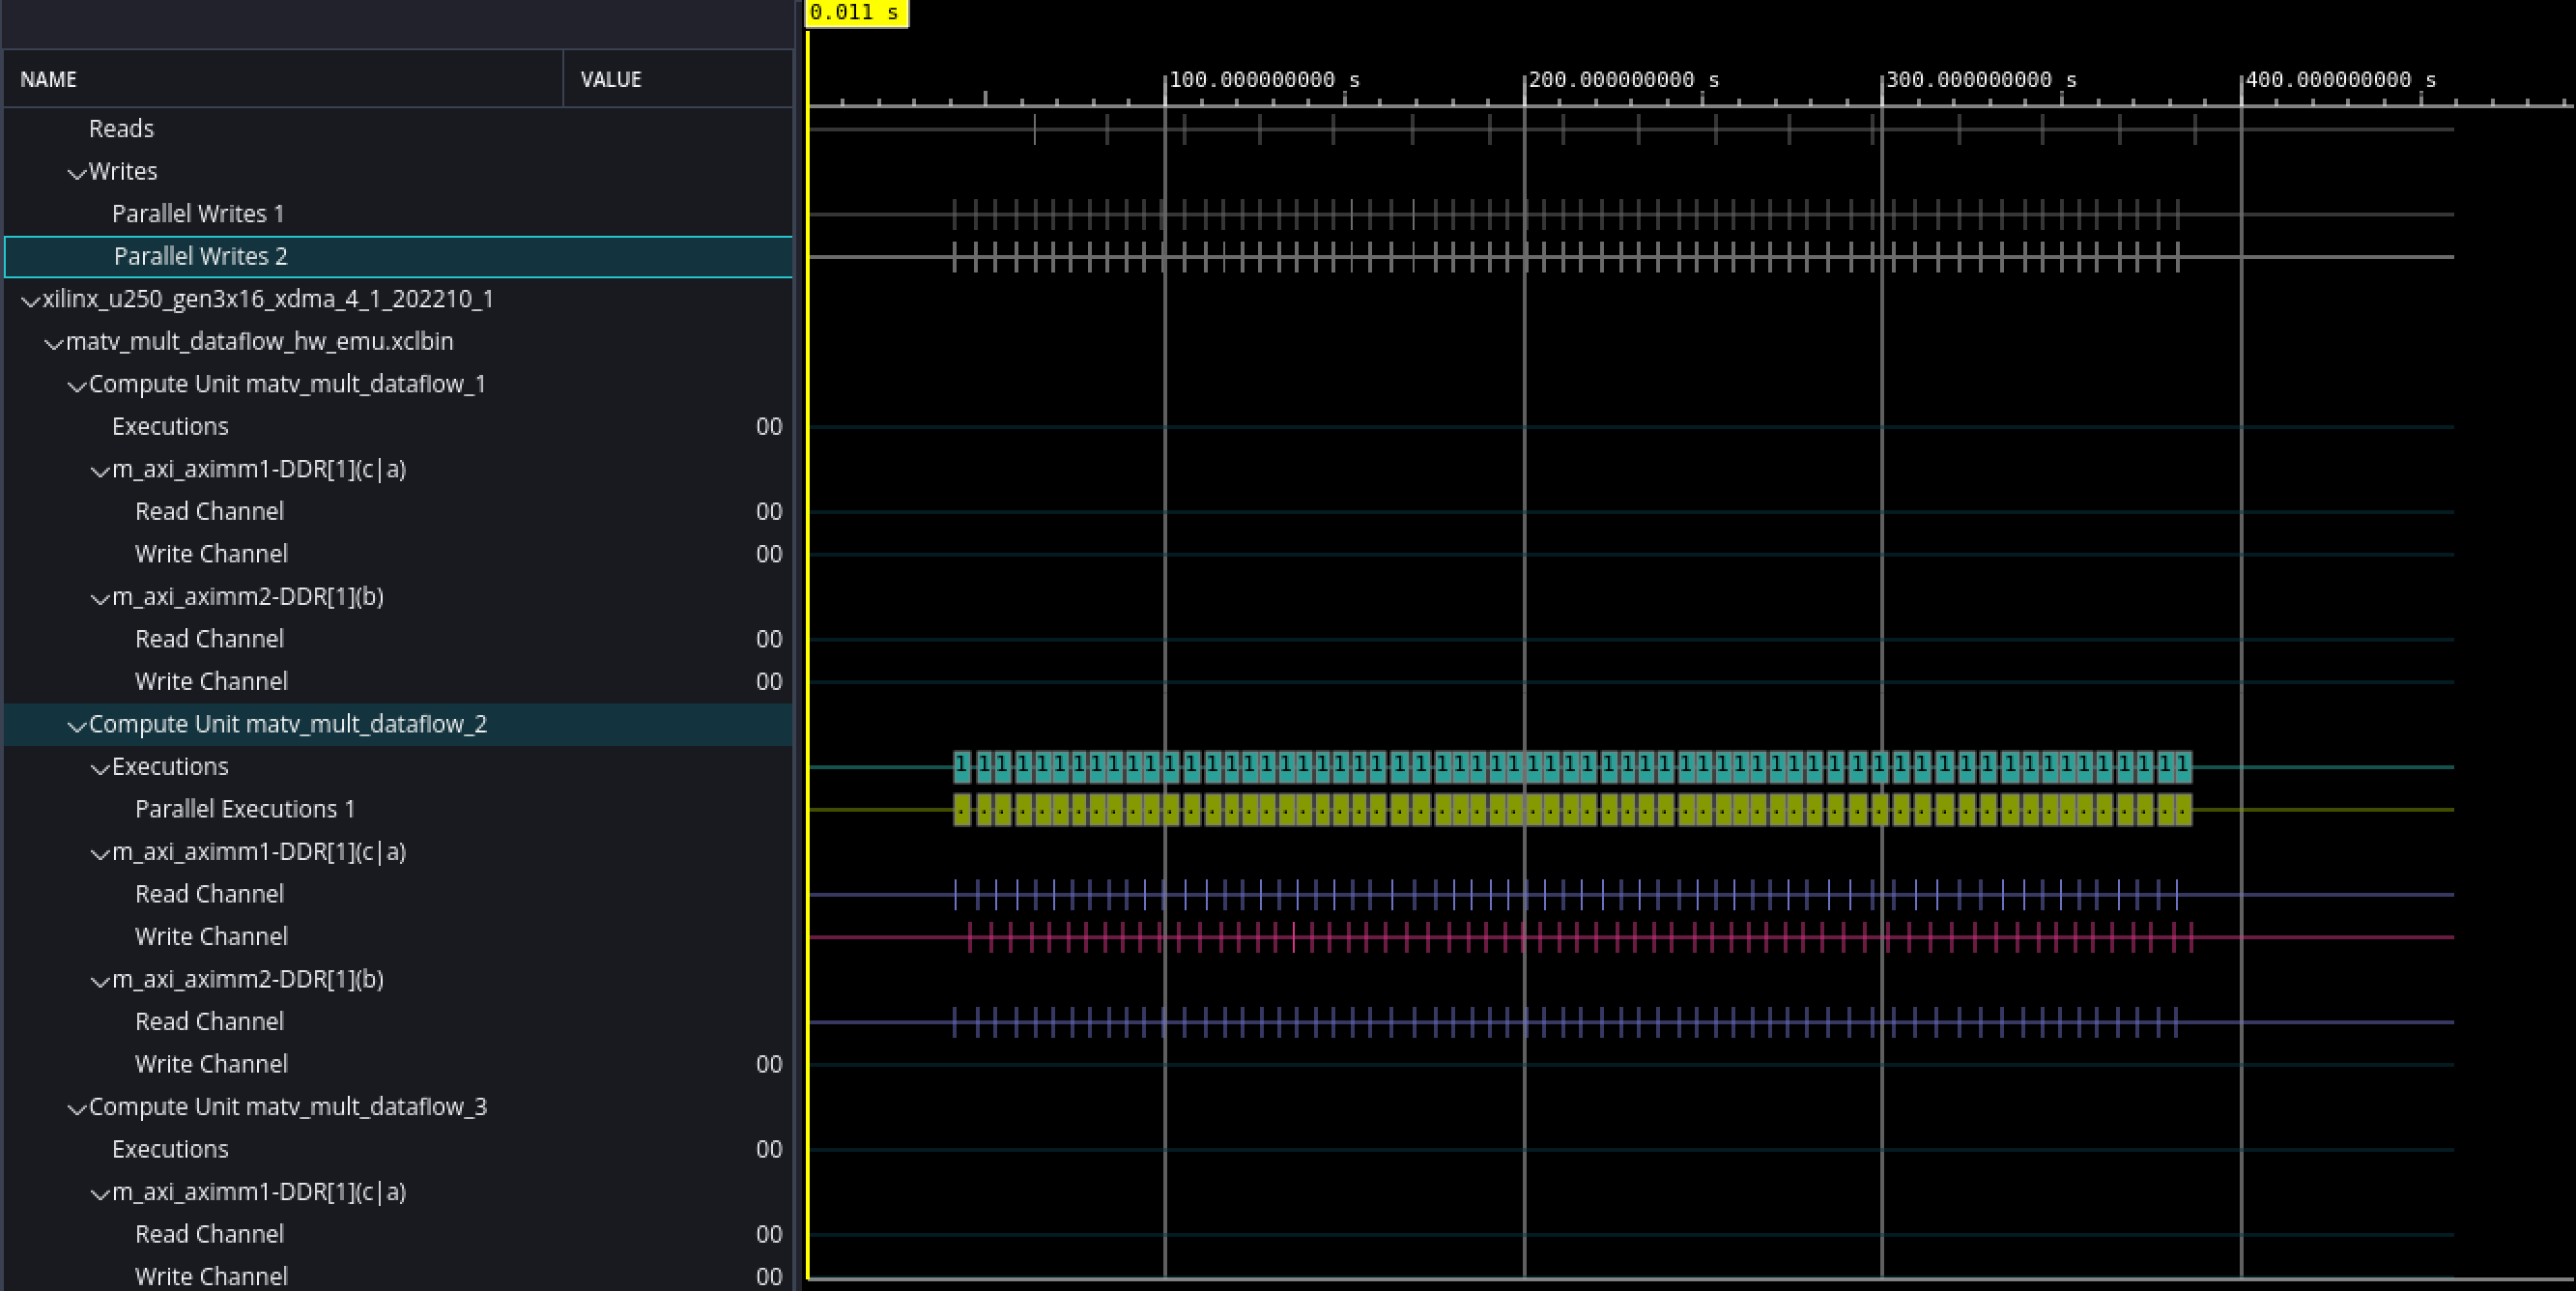
According to the image below, it's evident that only one compute unit is doing the work, contrary to our expectations. The compute unit corrensponds to the synthesized kernel on FPGA fabric. This behavior is due to the default configuration of the OpenCL queue, which executes all kernels in an in-order manner.
This default behavior, where a single compute unit is doing the work, is expected when multiple kernels share the same queue, as is the case in our scenario. However, in a situation where we have multiple queues, we have the potential to achieve parallel execution.. To distribute the work among multiple compute units with the shared queue and enable concurrent execution, we need to create a queue, which allows out-of-order execution.
1 2 3 4 5 6 7 8 9 10 11 12 13 14 | |
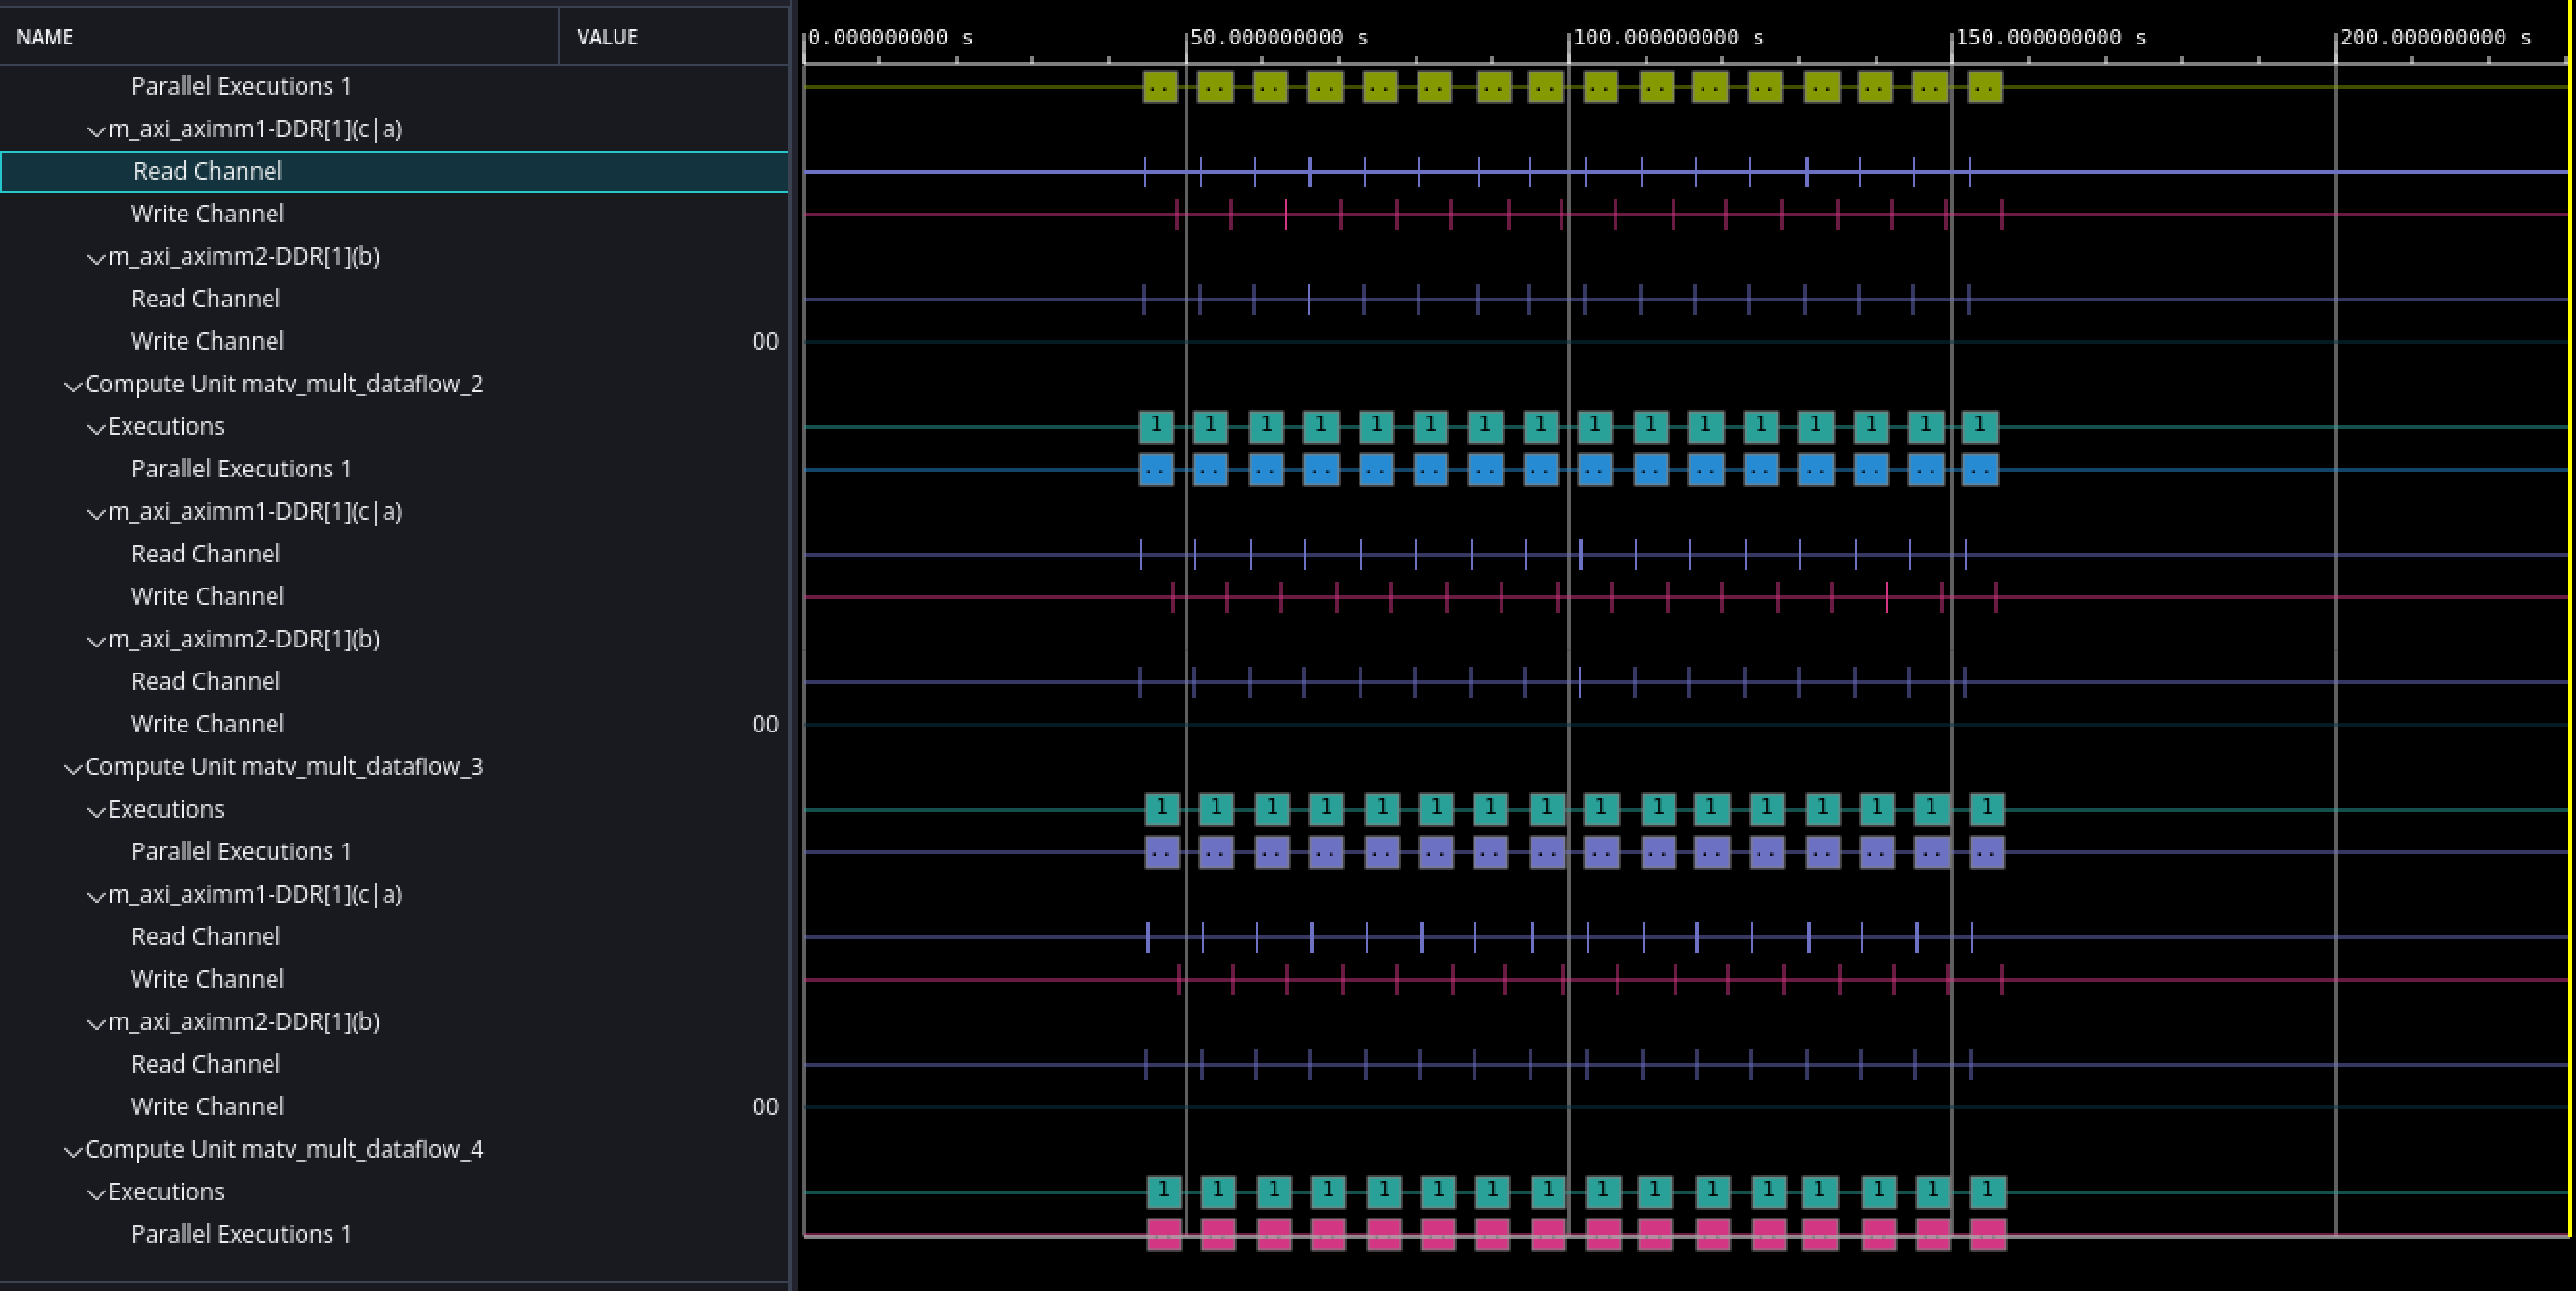
Out-of-order execution of kernels refers to a mode of operation where multiple kernels are launched for execution concurrently, and the order in which they complete their execution is not strictly determined by the order in which they were launched. In a traditional, in-order execution model, kernels are executed sequentially, one after the other, and the completion of a kernel must precede the start of the next one. However, with out-of-order execution, multiple kernels can be launched simultaneously, and their execution can overlap or be interleaved. After we set out-of-order execution, let's look at the obtained time traces.

As we can see, multiple compute units are operating concurrently, illustrating parallel execution. The corresponding code can be found in the repository.